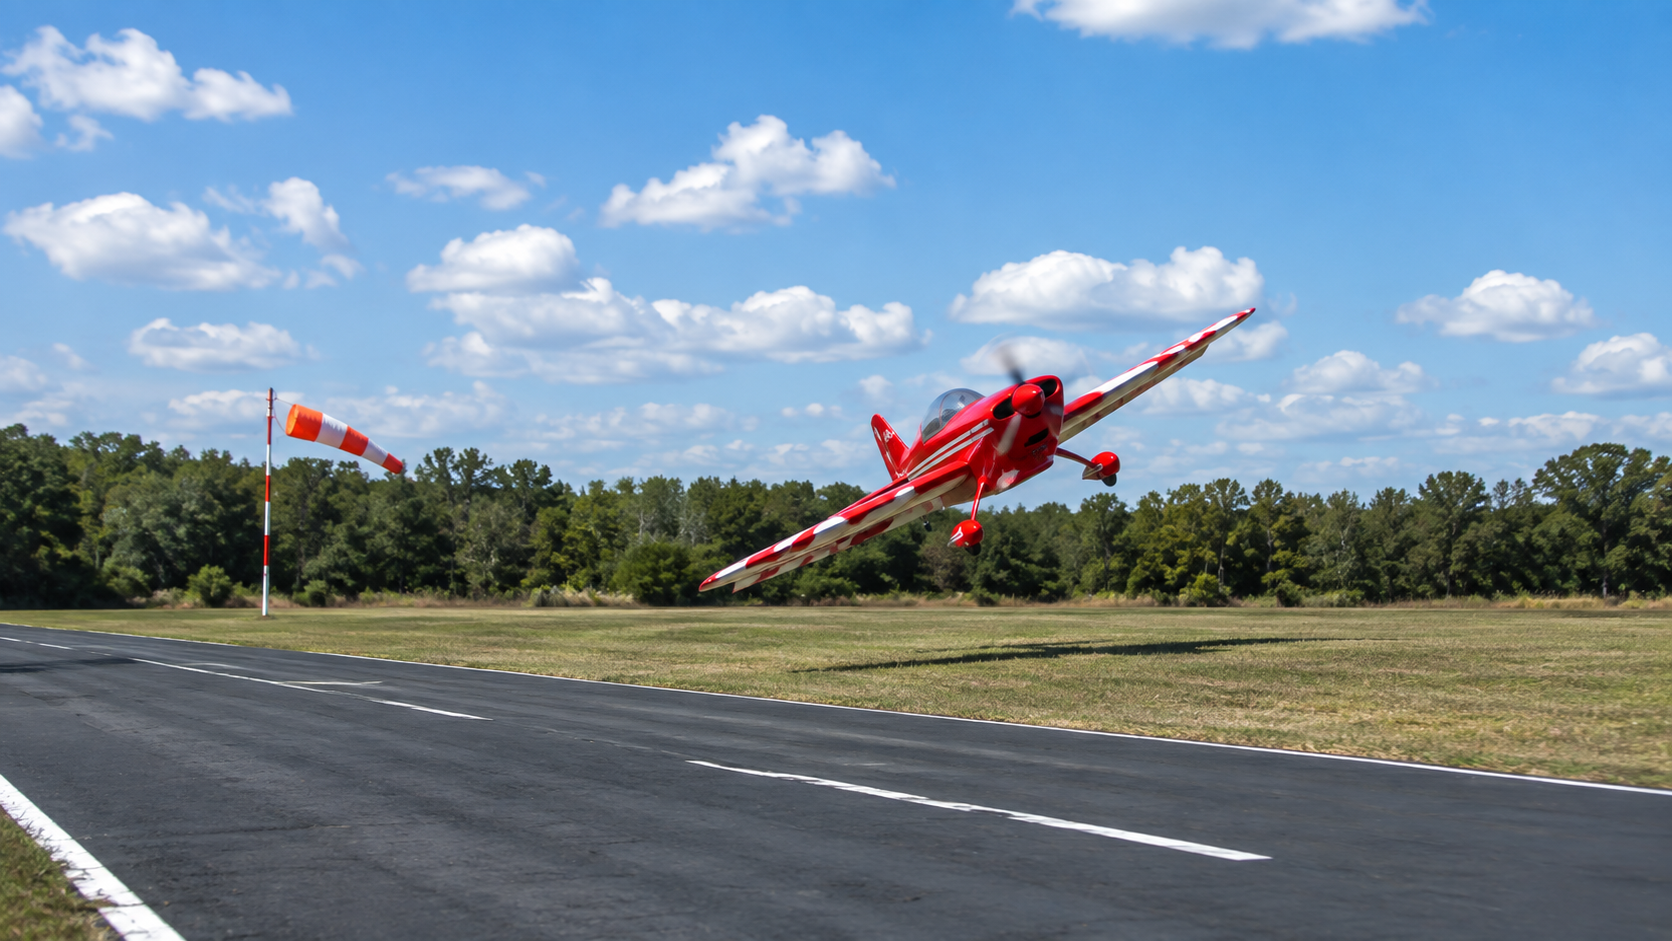
A perfect flying day would offer a smooth runway, steady sunshine, and a gentle breeze blowing directly down the centerline. In practice, wind direction is usually determined by weather systems that pay no attention to the pilot’s plans.
Sooner or later, every RC pilot faces a breeze crossing the runway. The model begins turning into the wind during the takeoff roll. It drifts sideways on final approach. One wing rises just before touchdown. A routine flight suddenly demands coordinated use of the sticks and a clear understanding of what the airplane is doing.
Crosswind flying is not an advanced aerobatic maneuver. It is a fundamental piloting skill. Once understood, it becomes less intimidating and far more predictable.
When the Wind Refuses to Follow the Runway
A crosswind is any wind that blows across the runway rather than directly along it. A wind coming from 90 degrees to the runway produces a full crosswind. A wind arriving at an angle produces both a headwind or tailwind component and a crosswind component.
The important question is not simply how fast the wind is blowing. Direction, gustiness, terrain, aircraft size, pilot experience, and runway conditions all affect the difficulty of a flight.
A steady 10 mph crosswind may be manageable for a heavy sport model flown by an experienced pilot. A gusty 6 mph breeze may be far more challenging for a lightweight foam airplane. Trees, buildings, vehicles, and nearby hills can also disturb the airflow, producing turbulence close to the ground.
Before flying, watch the windsock for several minutes. Do not judge the conditions from a single glance. Look for changes in direction, sudden gusts, and periods when the windsock becomes unusually active.
What the Airplane Is Experiencing
An airplane sitting on its landing gear behaves differently from one flying through the air.
During the takeoff roll, a crosswind pushes against the vertical stabilizer. Because the stabilizer is behind the main landing gear, the airplane tends to turn its nose into the wind. This is known as weathercocking.
The wind may also lift the upwind wing. If that wing rises, the downwind wing moves closer to the ground and may become vulnerable to a wingtip strike. A lightweight taildragger can be especially active during this stage.
Once airborne, the airplane moves with the surrounding air mass. The model may appear to drift across the ground even though it is flying straight through the air. The pilot must adjust the airplane’s heading to maintain the desired ground track.
Understanding this distinction is critical. The pilot is not trying to stop the wind. The goal is to position and orient the airplane so that its path over the ground remains controlled.
Preparing Before the Flight
Good crosswind flying begins before the motor starts.
Stand near the runway and determine exactly where the wind is coming from. Identify the upwind side of the runway and consider how the wind will affect the takeoff roll, traffic pattern, base turn, and final approach.
Inspect the airplane carefully. Loose landing gear, excessive steering play, a weak rudder servo, or a tail wheel that does not track properly may be only a minor annoyance in calm weather. In a crosswind, those problems can make directional control difficult.
Confirm that all control surfaces move correctly and in the proper direction. Pay particular attention to the rudder. Some pilots rely heavily on ailerons and rarely use the rudder during normal flying. Crosswind operations quickly reveal whether the pilot is comfortable coordinating both controls.
Set a personal wind limit before taking off. Do not allow the presence of other pilots to pressure you into flying. Conditions that are acceptable for a large trainer may not be suitable for a small park flyer.
The Crosswind Takeoff
Position the airplane on the runway centerline with the nose pointed directly along the runway. Apply aileron toward the wind before beginning the takeoff roll. If the wind is coming from the left, hold left aileron.
This input helps keep the upwind wing from lifting. The amount of aileron required will usually decrease as the airplane accelerates and the controls become more effective.
Advance the throttle smoothly. Sudden throttle application can make the airplane harder to track, particularly if the landing gear is narrow or the surface is rough.
Use rudder to keep the nose aligned with the runway. Do not use aileron to steer the airplane on the ground. The aileron controls the tendency of the wings to roll, while the rudder and steerable wheel control direction.
As the airplane gains speed, gradually reduce the aileron input while continuing to correct any unwanted yaw with rudder. Allow the model to lift off cleanly rather than forcing it into the air at minimum speed.
Once airborne, establish a positive climb before making major heading corrections. The airplane may need to point slightly into the wind to maintain a track along the runway. Climb to a comfortable altitude before beginning the first turn.
Managing the Traffic Pattern
A crosswind changes the shape of the entire landing pattern.
On the upwind leg, the airplane may appear to move slowly across the ground because it is flying into the wind. On the downwind leg, its groundspeed will be higher. This can make the pattern feel rushed even when the airplane’s airspeed has not changed significantly.
Allow extra room when flying downwind. Begin the base turn early enough to avoid being carried beyond the runway centerline.
Overshooting final is one of the most common crosswind errors. A pilot realizes the airplane is drifting past the runway, increases bank angle, and pulls harder on the elevator. At low altitude and reduced airspeed, this can create a dangerous situation.
Never force the turn. If the approach geometry is poor, level the wings, apply power, and go around.
A go-around is not a failed landing. It is evidence that the pilot recognized a problem and made a disciplined decision.
The Crab Method
One way to maintain the runway centerline during a crosswind approach is to use a crab.
In a crab, the airplane’s nose points slightly into the wind while the model travels along the runway’s extended centerline. From the ground, the airplane appears to be approaching at an angle even though its actual path is straight.
The stronger the crosswind, the greater the crab angle required.
The crab method is simple and effective during most of the approach. However, the airplane should not normally touch down while still pointed sideways. Just before landing, the pilot uses rudder to align the fuselage with the runway.
This correction must be timed carefully. If it is made too early, the airplane begins drifting downwind. If it is made too late, the landing gear may contact the runway while the airplane is moving sideways.
Models with strong landing gear may tolerate a small amount of sideways motion, but repeated side loads can bend wire gear, loosen mounts, damage retracts, or cause the airplane to ground-loop.
The Wing-Low Sideslip
The second major technique is the wing-low sideslip.
In this method, the pilot lowers the upwind wing with aileron and applies opposite rudder to keep the fuselage aligned with the runway. The controls are crossed, but the airplane remains fully controlled.
For example, with wind from the left, the pilot applies left aileron to prevent drift and right rudder to keep the nose pointed along the runway.
The airplane approaches with the upwind wing slightly low. At touchdown, the upwind main wheel contacts the runway first, followed by the downwind wheel.
The sideslip provides excellent alignment but requires coordination. Too much aileron can produce an excessive bank angle. Too much rudder can swing the nose away from the runway.
Many pilots find that the most practical method is a combination. They use a crab during most of the approach, then transition into a mild wing-low slip during the final seconds before touchdown.
The Flare and Touchdown
As the airplane enters ground effect, continue making small corrections. Do not freeze the controls simply because the model is close to the runway.
Maintain enough speed for positive control response. Crosswind landings often become difficult when pilots slow the airplane excessively in an attempt to produce a gentle touchdown.
Begin the flare smoothly. Use rudder to keep the fuselage aligned with the runway and aileron to prevent sideways drift.
Ideally, the upwind wheel should touch first. As the airplane slows, the downwind wheel settles onto the runway. Continue increasing aileron into the wind as control effectiveness decreases.
The flight is not over when the wheels touch.
Maintain directional control with rudder or nose-wheel steering throughout the rollout. Hold the upwind wing down and be prepared for weathercocking. A taildragger may require especially active rudder work as the tail settles and the airplane decelerates.
Do not relax until the model has slowed to taxi speed.
Common Mistakes
One of the most frequent mistakes is overcorrecting. Large, abrupt control movements cause the model to swing from one side of the desired path to the other. Use small inputs and give the airplane time to respond.
Another mistake is using only aileron. Aileron can control bank and drift, but it cannot properly align the fuselage with the runway. Rudder is essential.
Pilots also tend to reduce power too early. A small amount of throttle helps maintain airflow over the control surfaces and gives the pilot greater authority during the final approach.
Forcing a poor landing is another common error. If the airplane is too high, too fast, badly misaligned, or drifting beyond the runway, apply power and try again.
Finally, many good approaches are spoiled after touchdown because the pilot releases the aileron and rudder. Crosswind control must continue throughout the rollout.
Building Crosswind Skills
Begin practicing in a mild, steady crosswind with an airplane you know well. A durable trainer with effective rudder control and forgiving landing gear is an ideal choice.
Start by observing how the airplane drifts at altitude. Fly straight passes parallel to the runway and practice adjusting the heading to maintain a consistent ground track.
Next, make low approaches without landing. Practice holding the centerline, transitioning from a crab to runway alignment, and applying power for a go-around.
When comfortable, perform touch-and-go landings. Concentrate on one part of the process at a time, such as centerline control, rudder alignment, or keeping the upwind wing low.
Increase the wind strength gradually. Crosswind skill develops through repetition, not bravery.
The Smartest Landing Decision
There will always be conditions in which the best crosswind technique is leaving the airplane in the pits.
Avoid flying when the crosswind exceeds the capabilities of the airplane or your current experience. Gusty winds, nearby turbulence, poor visibility, mechanical concerns, or a narrow runway can turn a manageable breeze into an unnecessary risk.
Crosswind flying is ultimately about judgment. The sticks matter, but decision-making matters more.
Learn to read the wind, anticipate drift, coordinate the rudder and ailerons, and abandon an approach that is not developing properly. With practice, the sight of a windsock pointing across the runway will no longer signal trouble.
It will simply signal that today’s flight requires a little more piloting.
Have Questions?
Contact us about visiting the field, learning to fly, upcoming events, or club membership. We look forward to connecting with you.